Top Products from 2018, that I loved!

Right, so I found lots of new products that I loved in 2018.  I am always picking up bits to try out and although I do like to splash out occasionally, I do love when a product works well and has a reasonable price range.

The beauty market has been flooded recently with so many products that I find it hard to decide which one to choose, between foundation, tan, highlighters and skincare it can be a nightmare to find one that will suit you and that you won’t end up throwing in your drawer never to be used again.

I will always give my honest review on anything I use, but just bare in mind that although I might love/hate a product, it might be the opposite for you.

These are in no particular order but I loved them all and would/ will be purchasing again!


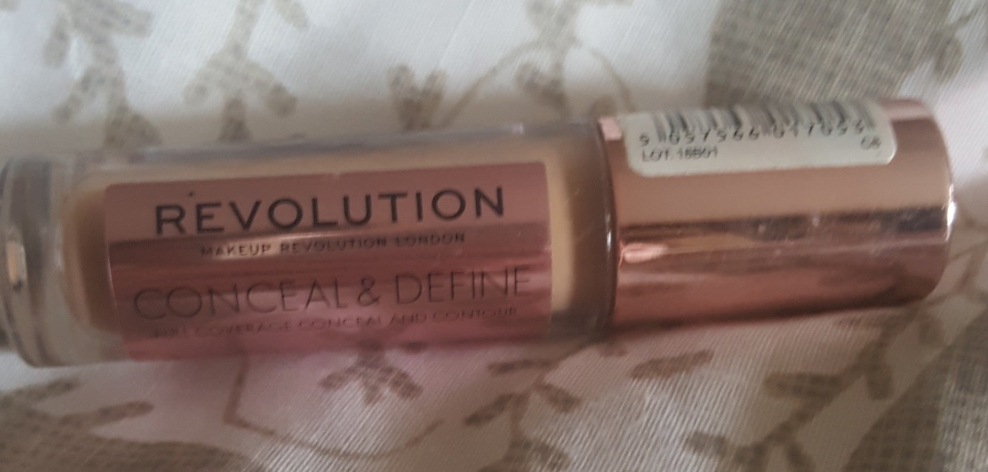
NOTE COSMETICS – Full Coverage Liquid concealer -€4.95
noteconcealor

This concealer is one of the best low budget concealer’s I have ever used.  It comes with an applicator and 3 different shades.  Ivory, Beige & Sand. ( There could be new shades brought out since)  It gives a full coverage finish but it is so light on the skin, it is great for under eye area to brighten up dark circles.  My only gripe is that I go through it very quickly.  I would love to see a large version being brought out, I’d be all over that.  My shade I use is Ivory.


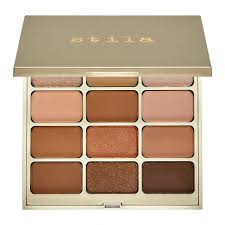
STILA – Magnificent Metals Glitter & Glow Liquid Eyeshadow – €27.95stila_kitten-karma_001_productHow did I ever live without these beauties! I currently have about 8 of these.  My favourite if I was to get only one would be Kitten Karma, its a light peachy golden shade that goes with any eye look.  It can be used on its own blended over the lid or added on top of shadows to give a pop of glitter to the eye.  There is no fall out with this, unlike some glitter shadows or pigments and there is no need for any glue.  Its pricey but lasts for ages.  If your wanting to treat yourself, pick up one of these.  Rose Gold retro is another beautiful shade, slightly more pink than Kitten Karma but equally bling.


THE ORDINARY – Coverage Foundation – €6.80

ordinary1.jpg

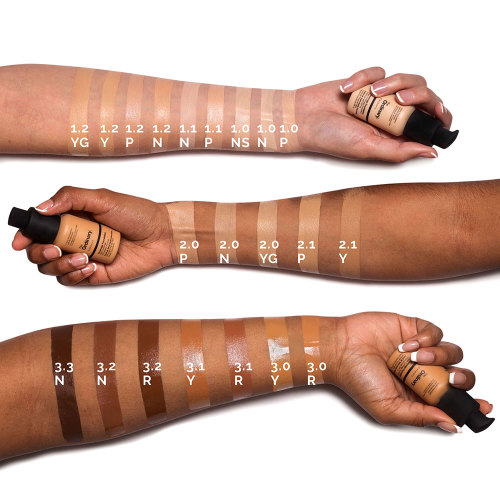
I bought this because I had heard great things about The Ordinary and I loved their skincare range.  I was sceptical that for that price is would be as good as it was.  This comes in lots of shades and they also do different tones, so P for pink undertones, Y for yellow undertones, R for red undertones and N for neutral tones.  This is great as we all have different undertones in our skin.

I prefer to use their 2.0 YG which is Yellow Gold, the gold being tiny flecks of gold going through the foundation which gives it a luminous finish.  The coverage is good, I would say medium coverage.  It also feels light on the skin so you don’t have to feeling like your face is dried or cracking. I have maybe 20 bottles of this now in all the different shades for use on clients.


BELLAMIANTA- Skin Perfecting Instant Tan – €18.00

instant_tan_1200x

I usually use self tan year round, its rare I don’t have it on but this has been a god send for days when I haven’t any on or want to spruce up tan that has been on a while.  It has a beautiful scent and it is really moisturising.  It evens out the skin tone and just gives a really lovely glow to the skin without feeling that usual sticky feeling you get with some instant tan.   I always bring their travel size one with me when  I go away for a few nights, it is a life saver especially if I don’t know what outfits I am going to wear.  Tan those ankles girl!!!  You can get 20% off on their website http://www.bellamianta.com if you use the code FAIRY20 ❤


NOTE COSMETICS – Skin Perfecting Illuminator – €8.76

77096601-0fbd-405b-824d-85926077b5ec.jpeg.jpg

I only found this gem around October, but I am already out.  I have used this every day and love it.  It primes your skin whilst adding a bit of a glow.  Similar to Mac Strobe cream but I need to be able to walk into a store local to me and pick something up which is why this is going on my best of 2018 list.  I also got a lot of use out of the tube, which is a decent 35mls.  For that price you cannot go wrong.


KIKO – Hydra Pro Mask – €6.25

kiko

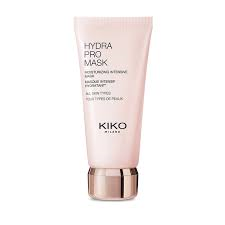
I have dry skin and if I don’t look after it nothing sits right on it, my make up starts to flake and crease and its just a nightmare.  I got this when I was Lisbon last year.  I use it once a week or if I am lazy once every 2 weeks.  It is a lovely light face mask that leaves your skin feeling so soft and hydrated after it.  It is ideal for all skin types and as usual the price is on point!

Kiko website is always doing great sales and they ship to Ireland also.


I have so many products that I have bought and loved but these were the ones that stood out for me be it price or quality.  You have probably heard me speaking about them on my social media, if you have any question’s don’t be afraid to send me a message.


Stacey x


Contouring & Highlighting the face – Explained

Hi All

I sometimes forget when speaking to clients or family & friends, that not everyone is as obsessed as I am about makeup.  I tend to waffle on in makeup terminology until I see someone’s face fall and then realise they don’t understand what I am talking about.

This is the last thing I want, is for someone to feel uncomfortable or uneasy because they haven’t a clue what any of these terms mean.  That’s perfectly fine to not know! That’s why your getting your make up done.

I am sure though it can put people off when purchasing makeup items, especially in store.  When a sales assistant starts to waffle on about transition shades, or asks you if you like a dewy or matte finish, they too probably automatically take it that you know what they are talking about.

I am going to do a quick guide on some of the terminology and techniques.  A lot of you will know what I am talking about but I have come across so many ladies that don’t know and it puts them off purchasing these types of products for that reason.


ContourHighlight2

Contouring 

Contouring is used when you want to sculpt the face, concentrating on the hollows of your face.  Long before Instagram and The Kardashians, people were contouring there faces on stage in the 1500’s.  It allowed people in the audience to see their expressions more clearly.

To put in simple terms, if you have a round face and desire that chiselled cheeks and jawline, then you can contour with a darker shade (one or two shades darker than your face) to create the illusion of this shape.

Contouring can be done using cream or powder based products and contrary to what you might think, the shade should not be bronze or orange toned, it should be more ashy to mimic a shadow on your face.  Do not get confused with Bronzer and Contour.  Bronzers are mostly shimmery but you can get matte types, but a lot of the time they are too orange or golden to contour with.

I have had ladies come to me and ask me why I didn’t contour their nose/face etc and I have had to explain there simply was no need for it.  If you have a tiny slim nose, then there really isn’t any need to contour it to make it look narrow, why would you when it already has the desired shape.

Highlighting

Highlighting does exactly what it says, it highlights points on your face that you want to be more noticeable.  I have to say I cringe a little when I see how overboard these technique has been taken, people are literally highlighting every inch of their faces, giving a really unnatural finished look.  You don’t have to go overboard to achieve a nice little glow.

Like with contouring you can use either liquid or powder highlight.  You must make sure if using a liquid highlight that you apply it before any powder products, otherwise it will clump.  Popular areas to highlight are : Under the brow bone, just above the cheek area, under the eye and also the centre of the nose.

Top Tip : Always remember that contouring is adding depth to an area and highlighting is bringing something forward.  So bare that in mind when you are applying these techniques.

Products that don’t cost the world that I would use in my Pro Kit

I just wanted to do up a quick little mini blog post of products I have that I really adore, that I’m not afraid to use on my brides or clients, because I trust them, I’ve used them, they have wowed me and I have probably bought multiple times.

Usually it is a case of if you buy shite, you buy twice, but there is always a few exceptions to the rule, here’s mine :

Sleek Solstice Palette Highlighter – I’ve used this on everyone, brides etcAs you can see its well loved. I use the lightest on in the inner corner of the eye, under the brow etc.  I use the peach and lavender shades as highlight on the face. Usually €13.49, its on sale on http://www.sammccauley.com for €6.49!                        Bargain.                     20180831_170949


Rimmel for Kate Moss Rock N Roll Nude 54 :  This is thee most versatile nude I’ve ever used.  I use this on brides all the time and its great as it doesn’t cost them a fortune to pick up one for top ups.  Its a pinky creamy nude and it lasts well and doesn’t dry out your lips. You can get it loads of places but in Boots its €7.4920180831_171039


MakeUpGeek Single Shadow Pans :  Oh these are one of my true loves when it come’s to eyeshadows.  They are super super pigmented and literally as smooth as butter.  I’d nearly go as far to say they are better than MAC especially when you counter in price.  They have a massive range of shades, my favourite and I must have gone through 10 of them is Dessert Sands ( fab as a transition shade) and Shimma Shimma ( a pinky shimmer fab on the lids).  I get mine on http://www.beautybay.com priced between €5.50-5.95 each)20171127_150515


Rimmel Wake Me Up Foundation :  I will wear this any day I’m not wearing tan which is usually weekdays except Friday especially days where I’m doing school runs.  It hasn’t a great shade range, which is why I haven’t bothered to try a darker shade, but it literally does wake me up, well my skin up when I apply it in the mornings.  Its light , smells lovely, has a slight iridescence to it  and blends perfectly into my skin, so I look alive and kicking doing the school run, most mornings .   I buy mine in http://www.sammccauley.com when they have 3 for 2, so I always get this and my Kate Moss lippie! Result.  €11.50

20180831_171251.jpg

Kiko Ever Lasting Colour Lip liner : I swear, I have MAC pencils that I’ve abandoned since I got this liner, I got it on hols, in shade 420 Rosy Brown, and its come everywhere with me since.  Its retractable so no paring! Great shade range, and if you sign up to http://www.kikocosmetics.com , click on Ireland and sign up for their newsletter you get €5 off your first order over €30.  This brand is serious quality for great prices.  Lip liner is €4.95

20180831_184905.jpg


Revolution Conceal & Correct Concealer:  I am loving this concealer, it gives good coverage and doesn’t budge beneath my eyes or disappear into any lines.  It has loads of shades, and I think I might buy the darker one, to maybe use as a contour.  I get mine in Sam McCauleys but they are everywhere at the minute. €4.99 20180831_171234

Kiko Invisible Touch Face Fixing Powder:  I usually get a little bit scared of powders on my own face, makes me feel a bit furry or something, like a peach haha! This is great, it leaves a soft matte finish which is lovely and light and colourless so sets any makeup great.  Its cute the way its packaged with a little puff also.  €12.95

20180831_185053.jpg

Ok ladies, that’s all I have in my bag of tricks tonight, did I say something about a little mini blog post? Mmmm I’ve been ages doing this, I may get my blogging skills looked at.  If you have any questions about any of these, give me a shout on my Snap/ Insta or Facebook , Stacey ❤


Makeup for the Over 30s Gang

Everywhere you turn, be it TV or social media, makeup seems to be everywhere, I like many others love to see all the new trends and products coming out but I have learned that not everything on the market even if it is targeted at my age group, is suitable for me. 

As a teen you didn’t really look at labels or care if  your honest, if you liked a colour or shade and it was cheap and cheerful you bought it, whacked it on and off you went.  My true love at 16 was my Pan-stick foundation and my Rimmel silver liner, thought I was gorgeous! 

Nowadays there is quality makeup out there to suit everyone’s age and budget so nobody should be feeling left out, or worse, wanting to wear makeup but not knowing exactly what to do with it!

Here are some tips that just might help anyone feeling over-whelmed but still not ready to leave down the makeup brushes just yet.

SKIN –

The one thing I find as your getting older is the need to keep your skin feeling moisturised can lead to your down fall when applying your foundation.  So many ladies have come to me for makeup wearing their usual moisturiser which is way way too greasy to apply makeup over, they usually seem shocked when I inform them of this and then the lightbulb moment when they wondered why their foundation slid from their faces.  You need to find a good moisturiser that will sink into the skin without leaving a greasy layer on top.  Anything like Ponds, Astral etc, ditch it ladies, or if you can’t live without it, keep it for going to bed!

Some ladies feel like their skin looks terrible and needs lashings of foundation to hide whatever flaws they might have.  This is the worst thing you can do! Full coverage foundations are great for skin that doesn’t have too many lines.  If you have a lot of lines then that foundation is going to sit right into those cracks, highlighting them even further.  A little simple list to keep in mind is the wording used on products will always point to what they are there to help with :

Matte : Anything that has matte in the name, is mostly for people who have oily skin.

Aqua/Water: If is an Aqua/Water based foundation tends to be lighter on the skin and can suit both oily and dry skin.

Oil: Oil based liquid foundations can be thick depending on the coverage it offers.  Full coverage foundations can be used but try not to go too heavy under the eye areas and lip areas, leave these for some lighter concealers that wont fall into lines or cracks.

Glow: If you see the word Glow, don’t worry it doesn’t necessarily mean your going to light up the office in work, it just means that it offers an illuminating touch which can be great to brighten up older/ tired skin.

Mineral : I have to say I don’t like mineral makeup, I find the powder dries me out completely but know plenty who love it, as its powder based it can work well with someone who has oily skin.

Stick: Stick foundations are usually full coverage and need to be blended well using a buffing brush, you need a good moisturiser and primer beneath these to allow them to blend well and give you the staying power you need, again concentrate on the outer face when applying and blend in towards the eyes and mouth area, it will mean the coverage isn’t too heavy here and you can conceal the more lined areas.


Concealers :

These will be your best friend.  For mature skin you want to stay away from heavy cream based concealers, you might see the words CAMOFLAUGE and think right I am buying 10 of these, don’t! Many times these are very thick and they end up highlighting lines.  Less is more when it comes to concealers, especially if your using it to brighten up tired skin and on lines. I tend to only use heavier concealers when hiding spots etc.

Any concealers that say brightening etc will be your best friend, these are used solely for under eye areas and anyone over 30 will benefit from these.

***Lightly apply your concealer under the eye and pat lightly with your fingers then blend with a small soft concealer brush, if you have to really rub it in , then its not right for you, this will pull and drag the skin under the eye and make them worse than to begin with.***

If you have discolouration under the eyes, dark circles, purple tones or broken blood vessels, concealer won’t always cover these, for this you need to colour correct.  This will make a big difference and save you from piling on the coverage.


If you under eye circles are more of a blue tinge, use a yellow colour corrector, on the colour wheel this cancels out blue.  If you are sallow and they are more of a brown/purple colour use a peach/orange toned corrector.  I will upload some pics of products designed for this.


POWDER –

For mature skin, I would always use powder sparingly, if you find your skin is looking a little shiny, dust some translucent powder over it to keep it in place.  If you are a fan of the trends then you’ll have heard of contouring and highlighting.  No one is stopping you from trying this out but a few little tips first before you do.

Contouring : This was actually a technique used by makeup artists to the stars many years ago.  If clients had a rounder face, then contouring between the cheeks and jawline in a different tone created the illusion of a thinner face, the forehead can be contoured if people find its too high, chin / jaw line etc.  You can contour is cream or powder, so remember if you have chiselled cheek bones, or a thin face you really don’t need to contour.

Sleek Contour Highlight & Blush trio
Sleek Powder Trio

Highlighting: This is the process where you want to show off your best features by highlighting them, so over the cheek bones are highlighted, down the middle of the nose etc.  The problem with doing this on mature skin is yes it highlights alright, for the wrong reasons, highlighting powders will more than often show any lines.  If you really want to use a highlighter, I would suggest a liquid highlighter, patted on with the fingers gently.


Blush : I love a bitta blush, don’t be afraid to use some blush.  A nice soft pink or peach blush brushed lightly across the apples of your cheeks is timeless and can be used on every age group.  If you don’t like powder , then try a cream blush, for this I always use the tips of my fingers and lightly tap and blend.


EYES & BROWS

Ok,  I think this is what most mature women struggle with.  Eyeshadow and brows.  Don’t give up on your brows! They really frame the face, they don’t have to be big and bold, but treat yourself and get them shaped or tinted, your eye makeup is never  going to look good if you have unruly or sparse brows that haven’t been touched since your debs in 1990.

When finding your perfect eyeshadow, always keep in mind that yes the Sparkly shimmering eye shadow palette looks beautiful but anything with shimmer etc in it will also draw attention to lines etc.  Go for matte shades on the eyes they will be your  best friend.  If you really love a bit of shimmer, add a small bit in a lighter shade, eg gold or shell coloured shimmers just on the lid above the lash line, never bring it any further.

Cream based shadows might jump out at you just because they seem easier and you can quickly rub them on with your fingers, but be aware that a lot of times after an hour or two you look and see that it has all settled into the crease of your eyes! Annoying!

Stila Neutral Mattes

Eyeliner…. If you eyes are hooded or tend to droop downwards, it can be almost impossible to do winged liner.  Instead your best bet is to smudge your liner into your lash line, its less harsh and still gives a bit of glam for special occasions.

flormar gel liner
Easy to use

Lashes – Ladies, do not be afraid of false lashes, they can take years off of you and make you feel like a queen! Gone are the days of the horrible thick black sheets of plastic on the lids.  Now you can get little wispy individual lashes to suit any eye or natural lash.  They might prove difficult to put on, if you really can’t manage it, any beauty counter or makeup artist should offer a service where so you can get them put on, once you buy the lashes or pay a small fee at the counter.

images1IVVIL2G
Penneys Individual Cluster lashes

LIPS –

Lips I find are something more personal, some people love bold lip colours, some ladies aren’t bothered with lips at all. What I would say is, if you have dry or lined lips, try and stay away from matte lipsticks or lipcreams, they are very drying and again will highlight this.  Go for a sheen formula, or a lip stain.  If you are wearing bolder  colours always line the lips in a similar shade to stop it bleeding out onto the skin.

km
Kate Moss Rimmel Lipstick


Hope that has helped you ladies.  If anyone has any questions please don’t be afraid to pop me a mail!


Stacey x


Foundations and “tones”

Most people think that finding the right shade of foundation is all that is needed, unfortunately that’s not the case.  Ever put on a foundation and think that just doesn’t match my skin at all.  Its more than likely the undertone is wrong.

There are 3 main types of undertones.  Pink, Neutral and Yellow.  These are also known as Cool(pink), neutral, and Warm (yellow).

Most of the main popular more expensive and larger brands will have their shades labelled.  This is where it gets very confusing for the average customer wanting to buy a foundation.  If Im honest it would nearly put you off as it can be hard to figure it out.

I’m going to try and help with this.

Pink/ Cool Undertones – This is probably anyone who doesn’t tan well, has freckles, or typical Irish skin.  Bare in mind, a lot of women choose to wear fake tan these days, so whilst you might in all your bareness have a pink undertone, once your tan is on you will most likely need a yellow undertone foundation!

Yellow/ Warm Undertones – These suit sallow, olive, tanned skin. ( Note I find yellow undertone foundations are great for anyone who gets red in the face, it neutralises it.

Neutral Undertones– These are usually somewhere in the middle, not too pink and not too yellow.  Be aware certain brands can be overly pink/ yellow than others.

On a little side note, just when you thought you got it, if your a fan of MAC then they go and throw a spanner in the works and do it the other way around.  So MAC label their foundations NC & NW.  Now after what I’ve told you above, you’d expect NC (neutral cool) to be pink tones, but not with MAC.  All their NC tones are yellowy in tone.  ThTheTheirNW have a distinct pinkish tone.  Check out the pic below —MAC NC25 & NW25 
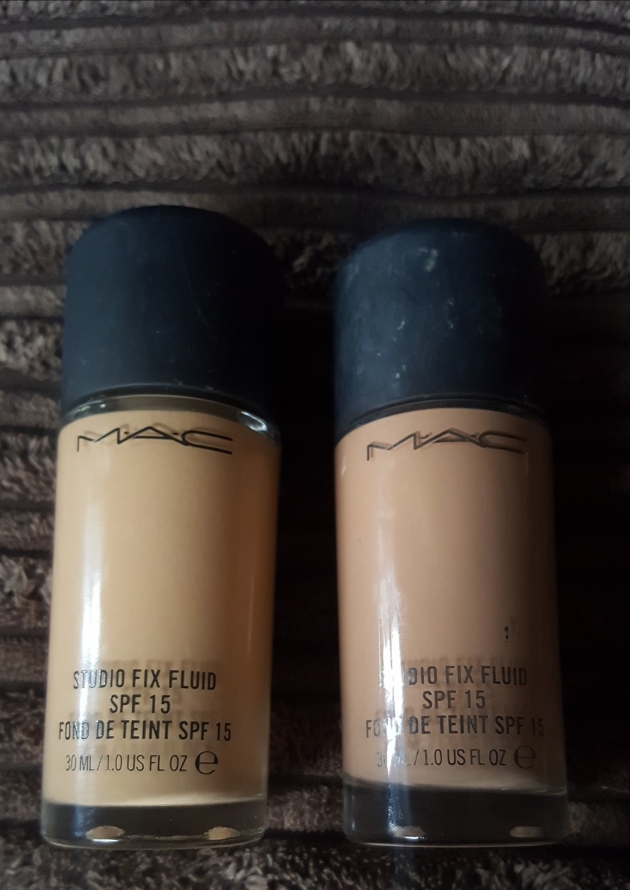
Left is MAC NC25 / Right is NW25.  Same shade number different tones

A really popular great value foundation brand, The Ordinary also label their foundations using the undertone system. Except they don’t confuse as much as MAC!

The swatches below show it really well :

swatchpopup_1_gl

N: Neutral,

P: Pink,

Y: Yellow,

R: Red

YG: Yellow Gold – this has lovely little gold highlight running through it

NS: Neutral Silver- this has silver highlight running through

So for arguments sake lets say usually your quite pale everyday, at work etc and you burn and get freckles easily…. Then in Mac Foundations you would probably be an NW 15 or The Ordinary – N or P from the first arm row at the top.

If you then like myself like to lather yourself in fake tan come the weekend then your foundation depending on the brand of tan ( some have horrible red/pink undertones!) then in MAC you would be an NC 20 upwards depending on how dark your tan is! Or in The Ordinary you would be the second row arm, Y shades.

Here are two shades I have from the Ordinary below. Even though both are in the 2’s , one is yellow toned and the other is a more orangey pink tone.


I also speak a lot about another favourite foundation of mine which is from NOTE cosmetics.  They have a very limited shade range, literally about 7 shades of foundation and I find they are all Yellow/ Warm toned, which I love but just beware some brands can favour a certain tone and tend to only bring out formulas with that undertone in it.

Right ladies I hope I haven’t confused you more than you already were.  Just remember Mac do it the other way around, so NC is yellow toned shades and NW is warm toned shades.

Thanks ❤

Stacey x

PS – Don’t be afraid to ask for a sample before you buy! It can be costly if you buy a bottle and realise it doesn’t suit your skin!! x

Using the correct Makeup Brushes

We would all love to be able to get our makeup or hair professionally done every time we go out but unfortunately that isn’t possible for most ladies.

I’m aware a lot of people really haven’t a clue which brushes to use and where to use them, so although you might have a bag full of tools you dread the thoughts of putting them to the test! Well I am going to explain which brushes you absolutely need and how to best put them to use.

Remember there are no rules when it comes to applying makeup, or to what brush you use. Peoples faces are all different, large eyes, small eyes, narrow face, long face etc.

So lets start with :

Foundation

Gone are the days where it was acceptable to use your fingers to rub in your foundation, its easier and more hygienic to use a brush.  The main brushes for foundation would be :

  1.  Flat Brush
  2. Buffing Brush
  3. Stippling Brush

If you want a dewy light coverage then a stippling duo fibre brush is the way to go, its soft hairs allow you to build up the coverage and give a flawless base, great for liquid foundation.

If you want a full coverage base then I would go with a buffing brush, these can come in different shapes, domed, flat, pointed etc.  This brush allows you to buff the makeup into the surface of the skin hiding any flaws or blemishes.  This can be used with liquid, cream or powder foundations.  Its also good to note that these come in different sizes, i.e the smaller the head the longer it will take to apply your foundation, I love the below one from Blank Canvas , the F01 Quick brush, well because… its quick to use!

The flat brush was one of the first foundation brushes around, it almost allows you to paint the liquid foundation onto the skin but it is probably my least used brush for foundation these days.

Eyes


Ok eyes are super important, but probably the most scary application out of all ! I will explain what each one is and what it does .

  • Flat shader brush- Any flat brushes are used for putting shadow on your lid, they come in different sizes and its always good to have a small one and a large one in the bag.  The small one can be used for under the eye to apply shadow.


  • Fluffy Blending brush- These are used for blending the shadows into the crease and above and this is where you would use them with your transition shade which is how you bring the shadow up the eye without looking like a panda. So you would start with a larger fluffy brush then work your way down in size depending on how many shades you want to use. A good rule of thumb is ” The darker the shade the smaller the brush”


  • Small tapered blending brush- These are for darkening the outer corner and working it into the crease, hence they are narrow and pointed to keep the shadow where it needs to be.


  • Liner brush- You can use either an angled liner brush or a plain liner brush, it really depends on which one suits your best, angled is great if you have mastered the winged liner. The angled brush also doubles up great as a brow gel applicator!


  • Smudging brush- These can be small bullet tipped brushes or flat ones, used specifically for smudging the shadow along the lash lines.


  • Blush & Powder

    Your never finished unless you add a dusting of powder or blush to the look.  If your oily you will most definitely need some translucent powder over your foundation or if your looking for those rosy cheeks then you will need to invest in a proper blush brush. If you really want to go all out you can also throw in a brush for highlighting those upper check bones and a contour brush for any hard to get angles.


So there is my run down of your everyday makeup brushes.  There are so many brands around now that you can get very high end brushes or some great quality budget brushes.  A good brush should last the test of time, meaning you should be able to clean them and with good care they shouldn’t shed.

No one will know your own face like you do, so don’t be afraid to try something new.

Enjoy!


Stacey x


Best Budget Concealers

Just wanted to do a quick list on my best budget concealers, I’ve used all of these and love them all because I keep going back and buying them again and also they are all affordable.

I don’t really have a top one out of this bunch, I just use whichever I feel will suit my skin on the day.  I will explain which one is best for what below.

catriceconcealor
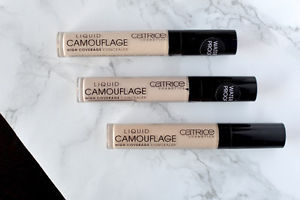
Catrice Liquid Camouflage Concealer

€3.50

This has great coverage for under the eye area and also for any little problem spots you might have.  There is only 3 shades though, and I find they are quite cool toned, could do with adding a warmer toned shade.


noteconcealorNote Full Coverage Concealer

€4.95

This offers full coverage but I find it very light on the skin which is great as you don’t get a cakey look and is also ideal for older skin that still wants some coverage.  The bottle always seems to go really fast for me, wish they did it in a larger size.


collection2000Collection 2000 Lasting Perfection Concealer

€4.99

This has long been one of my faves, but I don’t have a boots near me so I get it whenever I pass by one, there is 6 shades in this so a good choice.  This is full coverage and doesn’t budge once its on.  I sometimes use this as an eyeshadow base to really make the colour pop.


untitled

Maybelline Anti Age Eraser Eye Concealer

€11.99

This is the most expensive of the bunch and I’ve only discovered it recently but I love it! I use the lightest one under the eyes and down the middle of my nose to brighten.  The coverage isn’t as heavy as the others but it really does brighten up the under eye area.